Posted: 28-Feb-2018 | Category: General
Renault Master Van Conversion
These pages are intended to document the conversion of our new van to a motorhome / camper.
We currently have a VW Transporter T4 that I started converting in early 2016. We have had great fun in the T4, (and continue to do so whilst the new van is converted) but have decided we need something a little bigger, and with a toilet on board, so that we can go on longer trips and in colder weather conditions.
The key requirements for the new conversion were:
- A roomy, comfortable lounge area, with room to stand up
- An onboard WC
- Heating
Originally we had hoped to include a fixed bed, but that means going for a very big van, or compromising on the seating area, and so we removed that from our criteria.
Posted: 01-Mar-2018 | Category: General
Why a Renault Master?
We decided we needed to go up a size from the T4, so that discounted things like the Trafic, Vivaro, etc. Basically the next size up is where a lot of "professional" motorhomes lie, and they are predominantly based on the Fiat Ducato, some on the Peugeot Boxer which is mechanically the same.
I read a lot of van reviews, and the Renault Master seemed to come out well for driveability and comfort. Interestingly the Fiat Ducato gets poor van reviews, being described as a harsh drive, although the ultra modern cab dashboard is popular. I am sure the ride is addressed by convertors, but I personally dislike Fiat, having had one of their smaller vans some years ago, which had terrible reliability problems and felt flimsily made. I also personally didn't like the cab in the Ducato but would stress that this is entirely personal.
So we looked at the Renault Master / Vauxhall Movano - they are basically the same van. Surprisingly the Vauxhall versions all seemed more expensive, and came with a shorter warranty (we were looking for a van that still had some warranty left). The Nissan NV400 is also the same basic van, but there is not a dealer near us, so it was discounted.
So, the search focused on the Renault. We visited our local Renault garage, and they happened to have a pre-registered Master sat on their drive - and for a surprisingly good price! Lots of umming and ahhing later - in fact 2 or 3 weeks, and the deal was done.

The van was first registered at the beginning of January this year (2018), so when she arrived on 1st March, she was only 2 months old, and 18 miles.
So now the work begins - lots of planning first and then more as the build progresses....
Posted: 08-Mar-2018 | Category: General
Bulkhead removal
Next the bulkhead needed to come out.

This is straightforward (just undo all the bolts), except for a couple of rivets - one each side. These just spin so impossible to dril out, so a hammer and screwdriver are the order of the day. The rivet metal is soft (probably aluminium) so is easy to "smash" out


A nice open cabin:

I put the bulkhead on eBay to sell - not a lot of interest but got 99p for it! At least that saved me taking it to landfill.....
The floor ply has temporarily been left down to protect the floor.
Posted: 09-Mar-2018 | Category: General
Stripping out
The van was ply-lined, so that had to be removed.


There are Renault fitted boards fitted to the lower panels and rear doors - these will be removed as we go along.
Posted: 25-Mar-2018 | Category: General
Rear Doors
One of the downsides of going with the Renault is that there is less help online! So removing the rear panels was a bit of an exercise.... I have set it out below in the hope of helping someone in the future.
Nearside Door

The nearest panel is easy to remove - just pull out the the black clips. I found the easiest way was to slide a finger nail under the lip to slightly lift the edge, and then slide in the claw of a crowbar and lever the clip out.

Panel removed.
Offside Door

The offside door panel uses the same clips, but also a pull handle, a lock button and door handle. The door handle is held in place by a wire clip, which can be pulled out using a pair of long nose pliers. The door locking kob is removed by firmly pulling it off - be brave! The pull handle has some clips at the bottom which can be accessed once the panel clips have been removed.
As well as insulating the door, I wanted to add a rear view camera - see next post.
Posted: 25-Mar-2018 | Category: General
Rear view camera
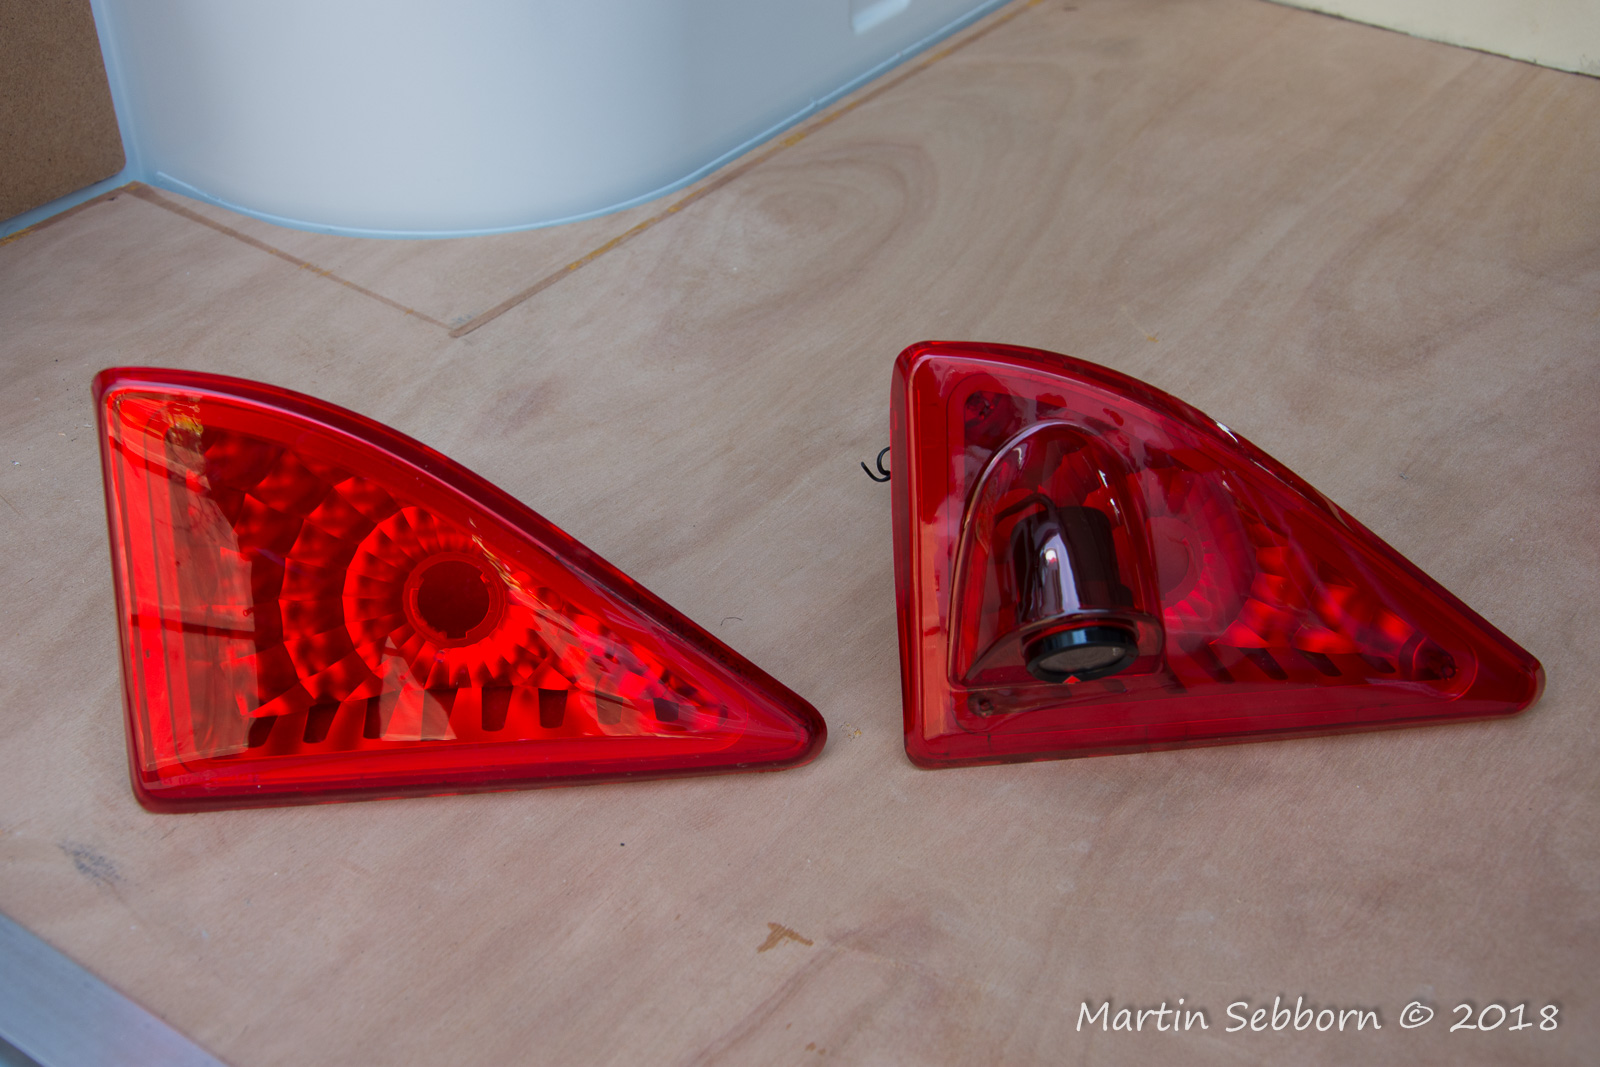
The rear of the van does not have windows, and in any case there will be a rear bullkhead for a storage area, so I wanted to install a rear view camera. The good news is that a replacement high level brake light is available with a built in camera. The image below shows the original light and the new camera containing one.
The rear panels need to be removed to fit the camera.
The photos below show the original light fitted and then the replacement.
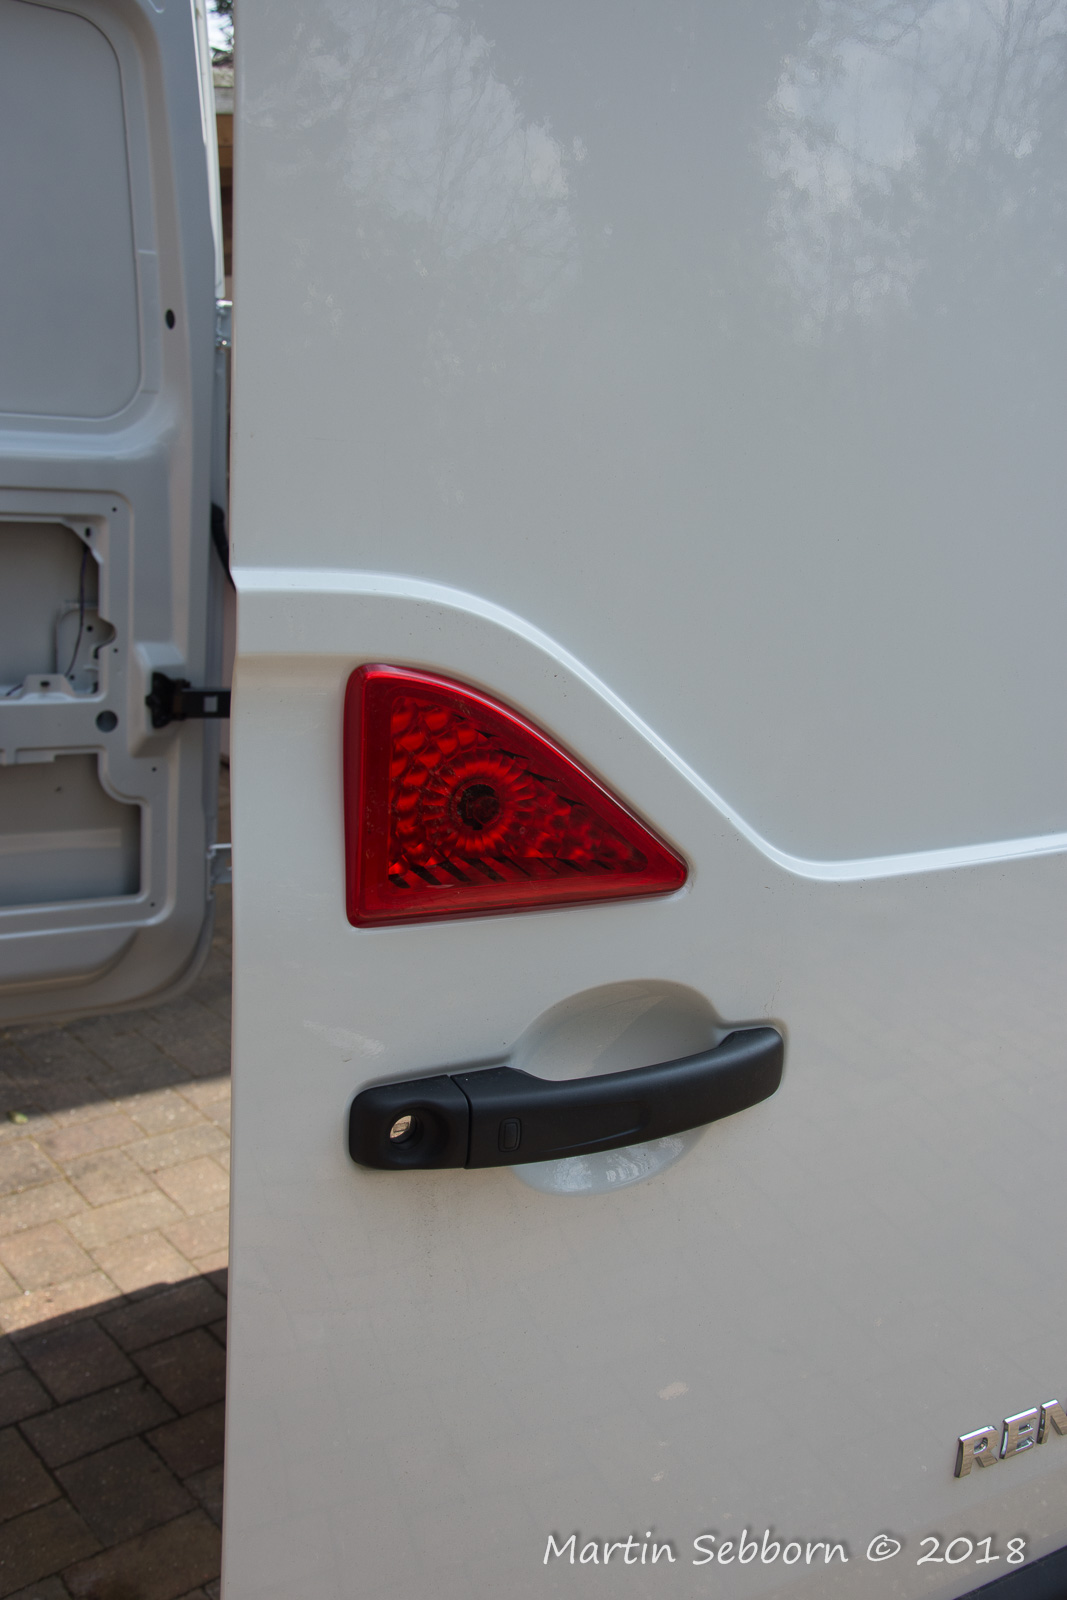
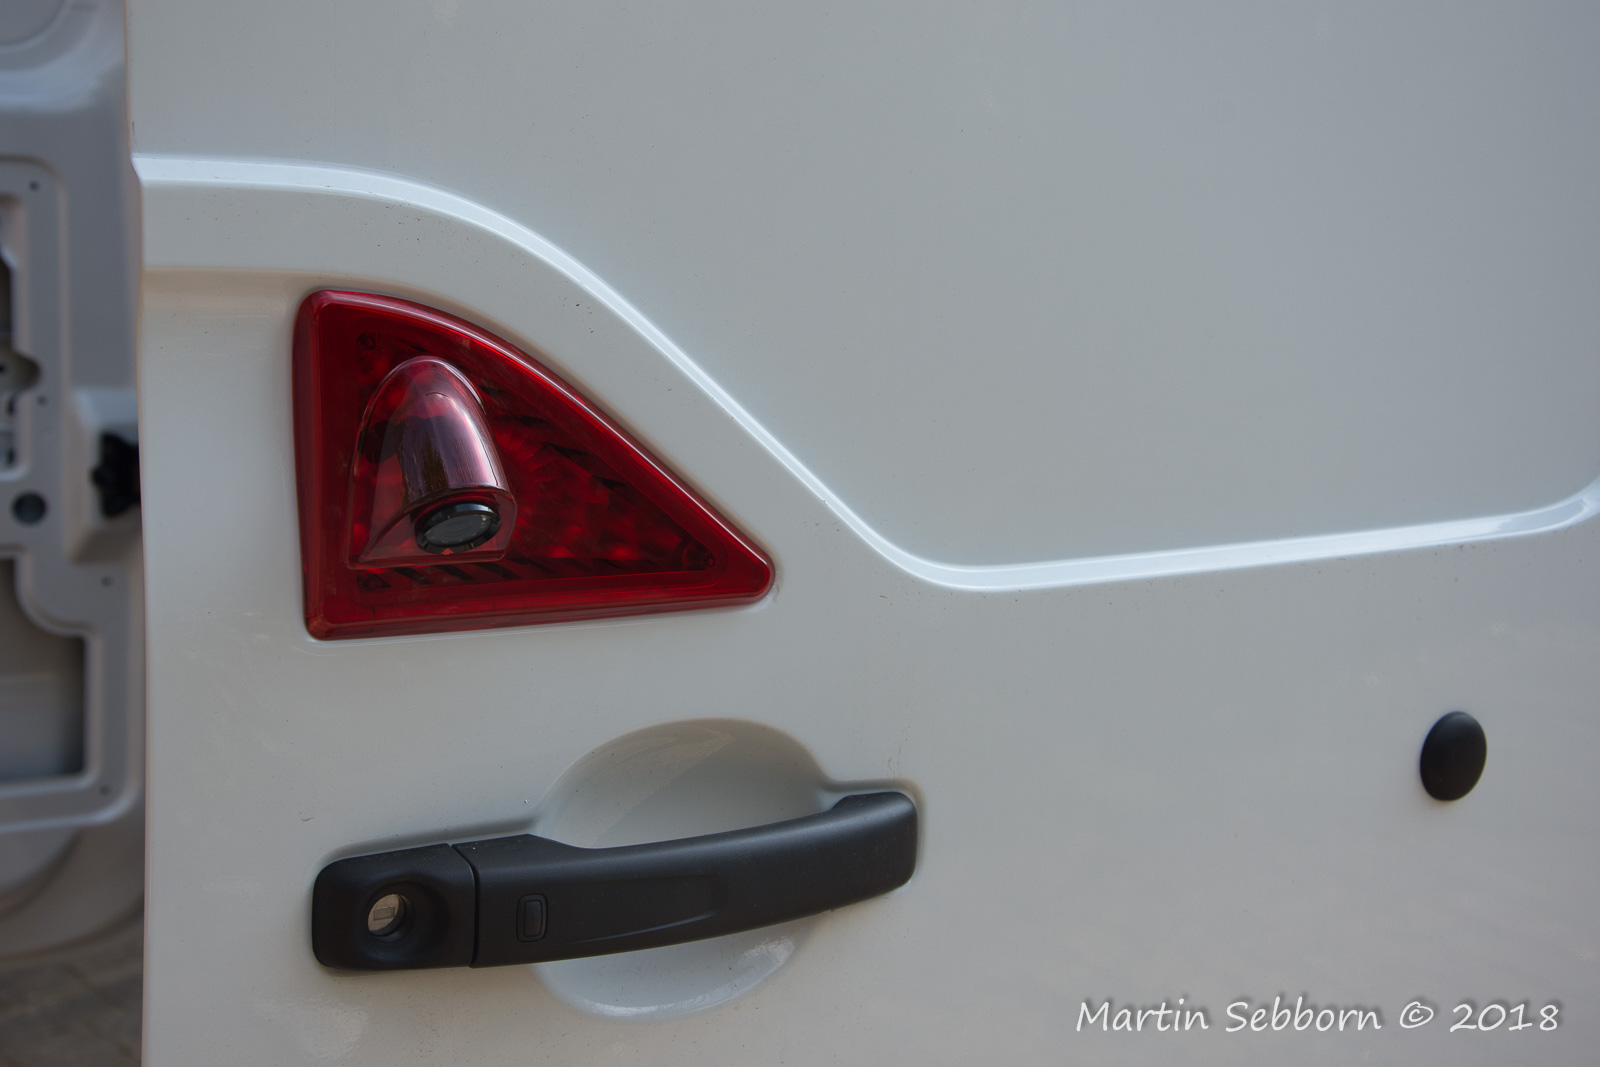
The light is held in place by a single nut, accessed using a socket from inside the door. The existing bulb holder is transferred to the new light fitting.
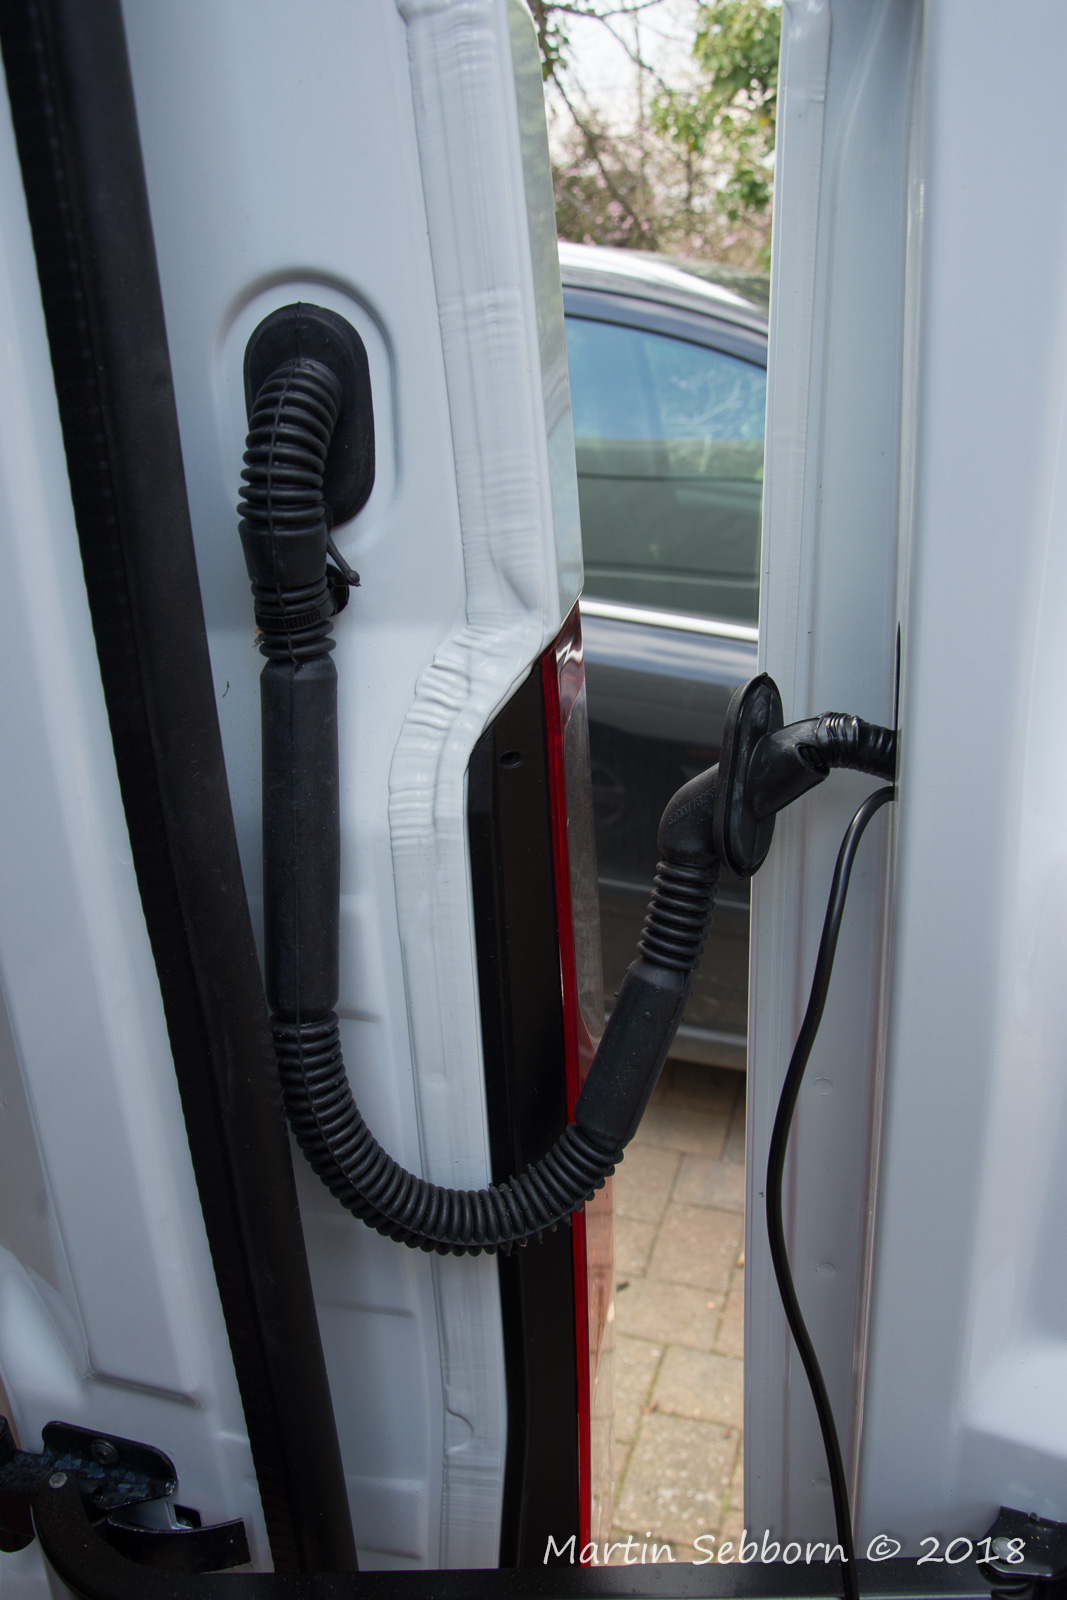
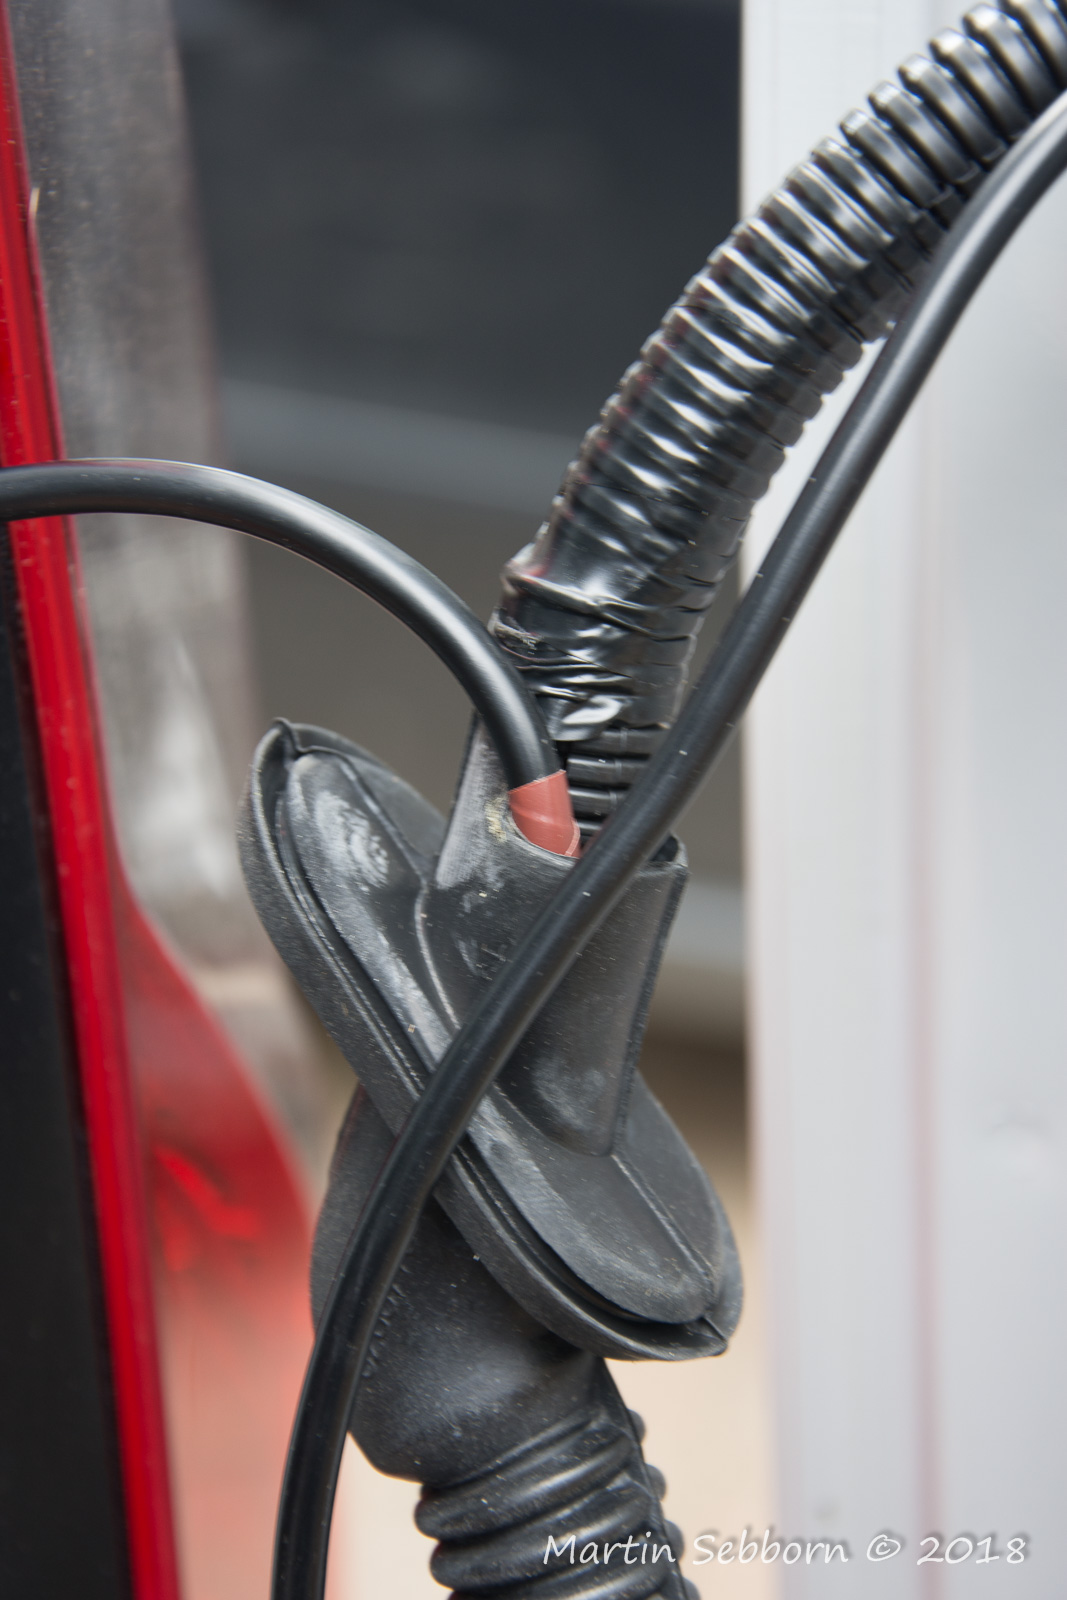
Running the cable
The cable is run across the door and then through the rubber hose linking the electrics to the door. This is best acheieved by disconnecting the loom just inside the rear door pillar so that the hose can be pulled out of the post and held straight to thread the cable through.
The cable is run up the rear post and along the roof line of the van to the front.
Monitor
I purchased a 7" monitor, with the intention of mounting it on the parcel shelf in the cab.
Posted: 26-Mar-2018 | Category: General
Planning the electrics
Some thought has gone into the electrics onboard:
Mains Hookup
An essential element - on the T4 we coud sneakily hide it behind the rear fog light, but on the Master it will need to be a side fitting socket.
Batteries / Charging
Consideration needs to be given to the size of the Leisure Battery. In reality our power demands are not huge - the one thing that will eat power when offgrid is the fridge. Otherwise there will be lights, and occasional things to charge, like phones.
Lighting
Lighting - we've determined these zones.
| Zone | Description | Notes |
|---|---|---|
| 1 | Cab lights | For front seats |
| 2 | Lounge overhead | General lighting |
| 3 | Kitchen overhead | trip lights? |
| 4 | Strip / ambient | Where? |
| 5 | Bedside | Separate control |
Fridge
A fridge is likely to use more power than most other things we intend for the van, and so will have a separate switched, fused supply direct from the leisure battery to the fridge.
Other
Power is needed for:
- Water pump
- USB charging points
- Accessory points
Solar
We are still thinking about solar!
Posted: 26-Mar-2018 | Category: General
Starting on the insulation
Insulation
There are a number of options for insulation, the most popular being closed cell "Celotex" insulation and spray foam. Spray foam has the advantage that it also acts as a vapour barrier, but the cost is extremely high, even if done yourself. I also have concerns about onging maintenance with spray foam, and as I had used Celotex in my previous T4, I was happy to go down that route.
Ideally I would have got all the windows and rooflights in before starting the insulation, but the weather has stopped me getting on with those, so I started insulating areas that were going to be clear. I also needed to bear in mind wiring and pipework, so only limited work has been done so far.
A couple of sections of roof were expected to be clear. The roof is to be insulated with 25mm board - I would have liked to use 50mm board to get better insulation but was worried about loosing headroom, and so stuck with 25mm (which has been fine in the VW T4 and as that is red, tends to get hotter anyway.
The insulation boards are cut to fit into small panels to suit the curve of the roof - and they are held in place using “stick pinsâ€. “Stick Pins†are used in the ventilation trade for insulating heating and cooling ducts. The pins have a very sticky base, and the panels are pushed onto the pins, then fixing plates attached before being covered in foil tape- there are Youtube videos showing how to do this.
The gaps at the edges of the boards are filled with expanding foam - I use Soudel low expansion foam in order to control where it goes. The joints are then covered in foil tape.
The walls of the van are being insulated using 50mm boards - using stick pins where appropriate, and again using expanding foam. On the walls I am also using thermal wrap, although this is to act as a vapour barrier rather than for insulation.
In any areas where the celotex will not fit, I am using earthwool.
Wall insulation
 First panel done
 Second panel done
 More panels done and covered in thermawrap|


